This article will explain how to effectively organize and schedule multiple tests session so that you can take different tests during the same session. A multiple tests session is a session that allows you to take multiple different tests of the same delivery preference.
Creating a multiple tests session #
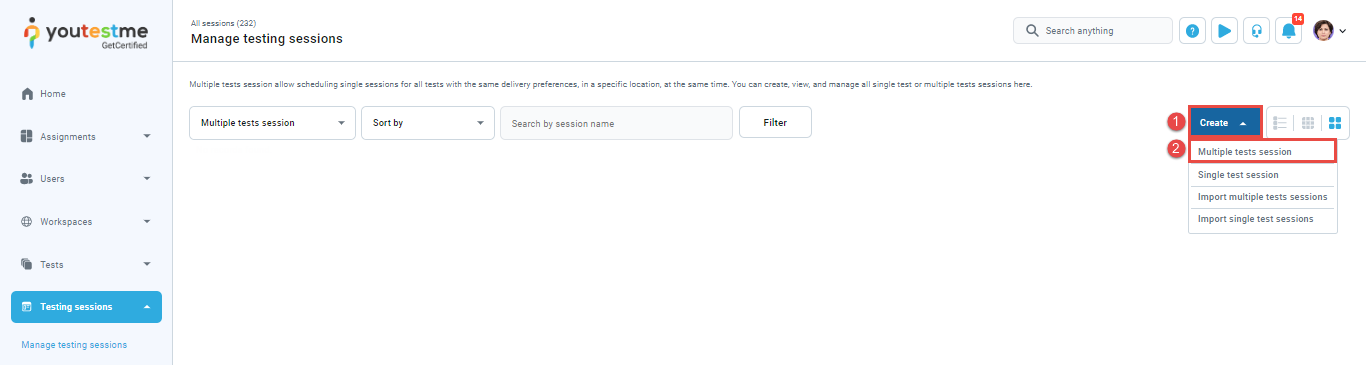
To create a multiple tests session, navigate to the Testing sessions tab in the left-side menu and click on the Manage testing sessions tab.
In the top right corner, click Create and select Multiple tests session.
The new Create multiple tests session pop-up will show up where you should :
- Enter the session name.
- Choose the desired delivery preference – The delivery preference allows test creators to plan the organization of the test under different locations and conditions. It filters and highlights immediate actions for different types of test distributions. The option favors specific ways but doesn’t prevent other styles of deliveries if the configurations allow it. The most common way to take the test is via the application. You can choose the following options:
-
Online.
-
Paper-based.
-
Pearson VUE testing center.
-
Online AI-proctored.
-
Online live-proctored.
Note: The default value for the delivery preference is Online live-proctored.
-
- Choose a previously created location (optional). Each location can either be a physical room or a virtual space with a pre-defined time zone, offering improved organization of testing sessions. For more information, please read the How to create a new testing location article.
- Choose a room (optional) – You can add a session room description to better define the session’s physical or virtual location.
- Enter the start date – define from when the test will be available to start for taking.
- Enter the end date – define the time until which the test will be available to start.
- Candidate self-enrollment – If this option is enabled, users can book, purchase, or start the test independently without needing the manager to assign them manually.
- Authorization required – If this option is enabled, only those users who have authorization for the test within the testing session will be able to book or start it.
- Show booking settings (optional) – If you click on this button, the following options will appear:
- Booking deadline – Enter a deadline before which a test within this session can be booked.
- Cancelation deadline – Enter a deadline before which a previously booked test within this session can be canceled.
- Capacity – Define the number of candidates that can take their tests within this session.
- Show proctoring settings (optional) – If you click on this button, the following options will appear:
- Proctoring – If this option is enabled, a proctoring mode for this session will be applied.
- Meeting – If this option is enabled, the candidate will have to join the live meeting before starting the test. Once the candidate joins, the proctor should allow them to start the test. The system can automatically create the Webex meeting, or the proctor can provide a link to the other meeting host.
- Locked (optional) – If this option is enabled, the candidates will be able to start the test within this session only by entering the password.
- Additional instructions (optional) – Field for adding additional instructions for the session.
-
Enter the External ID of the location used in external systems (optional).
-
Enter the External name of the location used in external systems (optional).
-
Data source – Name of the external system (optional).
- Click on the Save button to create a session.

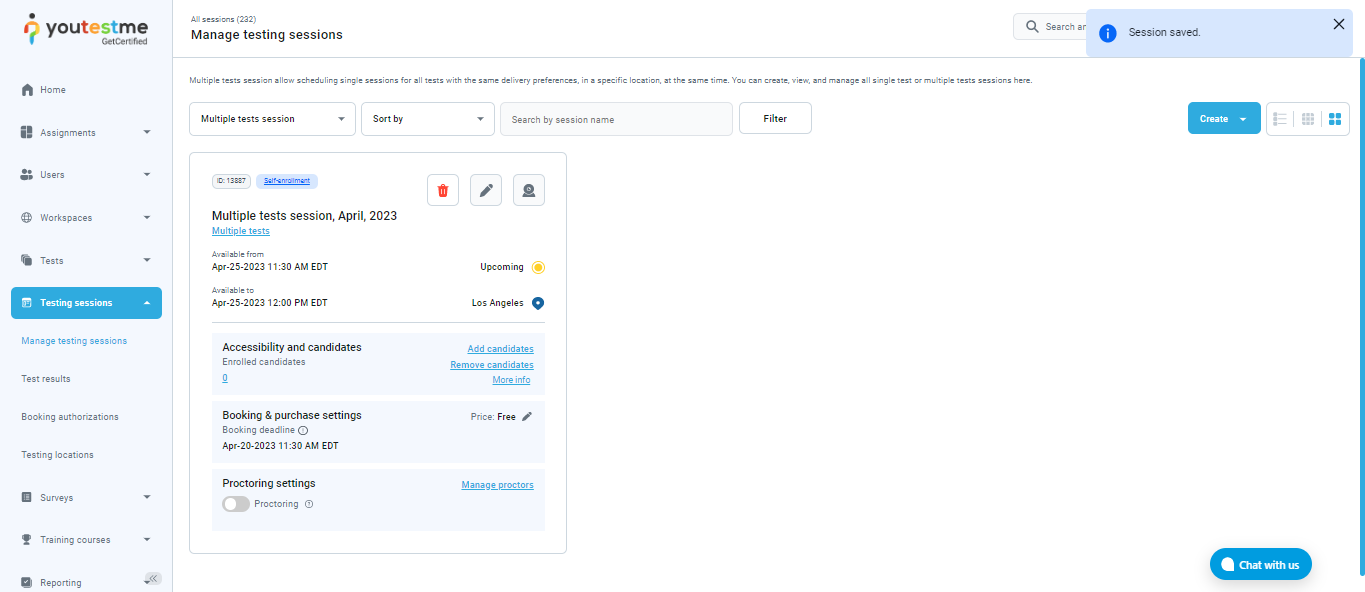
Once the session is created, it will be displayed on the Menage testing sessions dashboard.
Managing existing multiple tests session #
Editing a multiple tests session #
To edit the previously created session, click on the Pencil icon.

The edit pop-up window will appear, allowing you to modify all the session settings except for the delivery preference and location.
Deleting a multiple tests session #
To delete the previously created session, click on the Trash icon.

The session can be deleted only if no candidates are assigned.
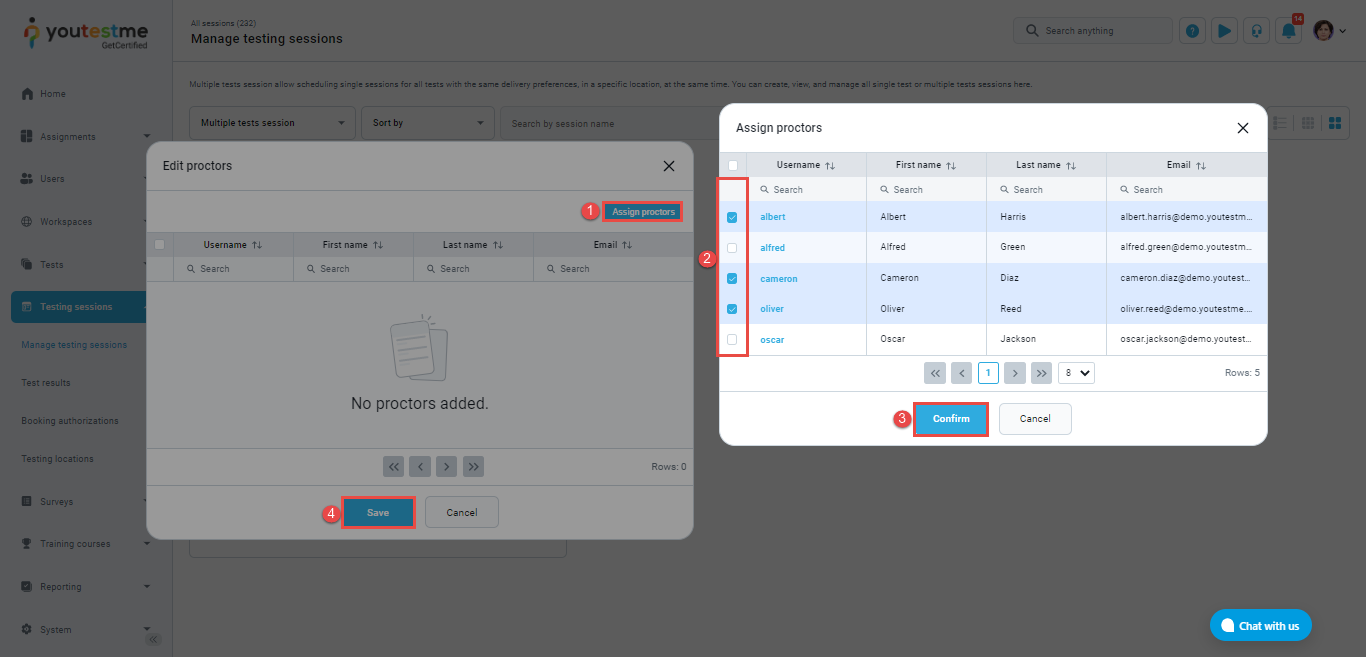
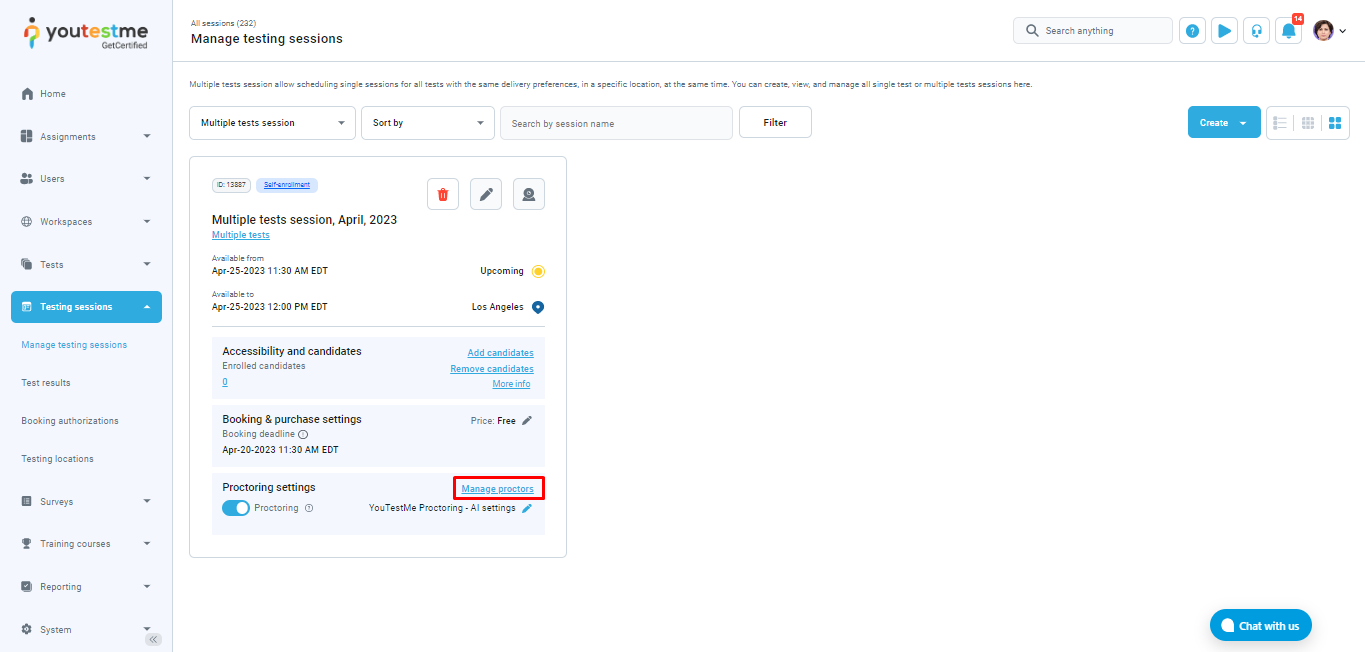
Assigning proctors #
To assign proctors to a previously created session, click on Manage proctors on the session card.
Click on Assing proctors, and the list of users will appear. Check the users you want to assign as proctors and click Confirm. After that, click on the Save button.