This article explains how to add a step to a training course, attach multimedia files (learning material) to a step, and configure settings.
Adding steps #
- Navigate to the “Training courses” tab.
- Choose “All training courses”.
- Click on the name of the training course that you want to edit.
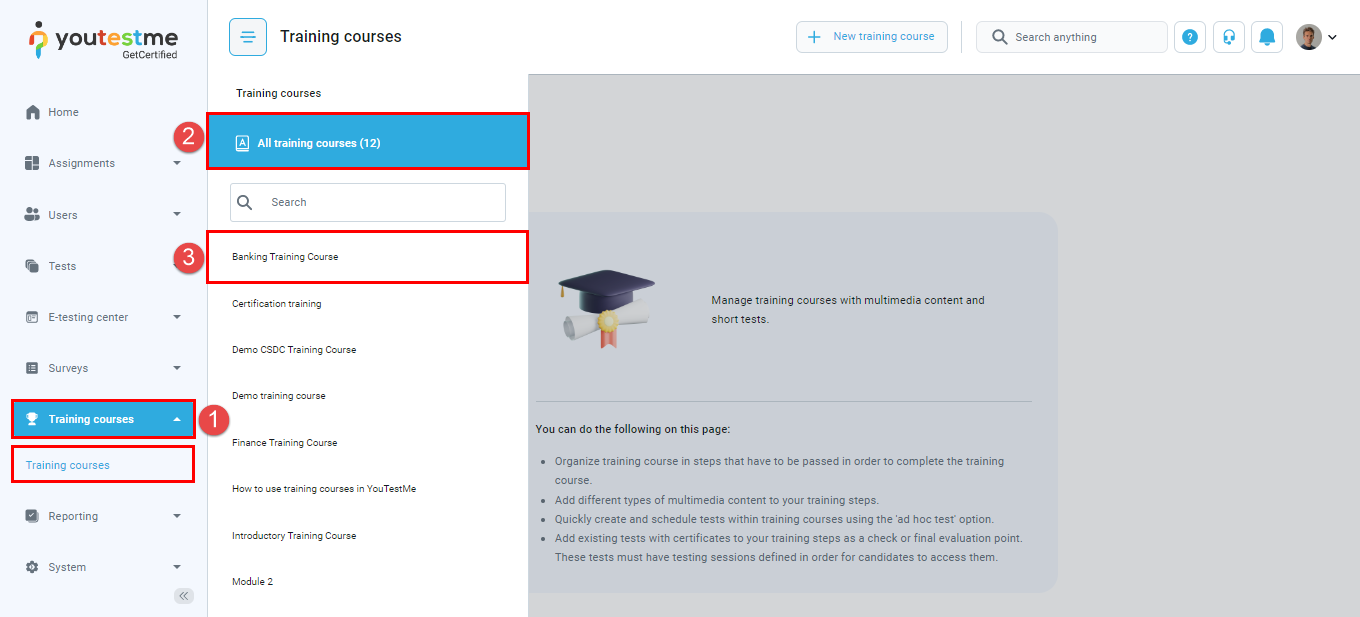
- Navigate to the “Steps” tab.
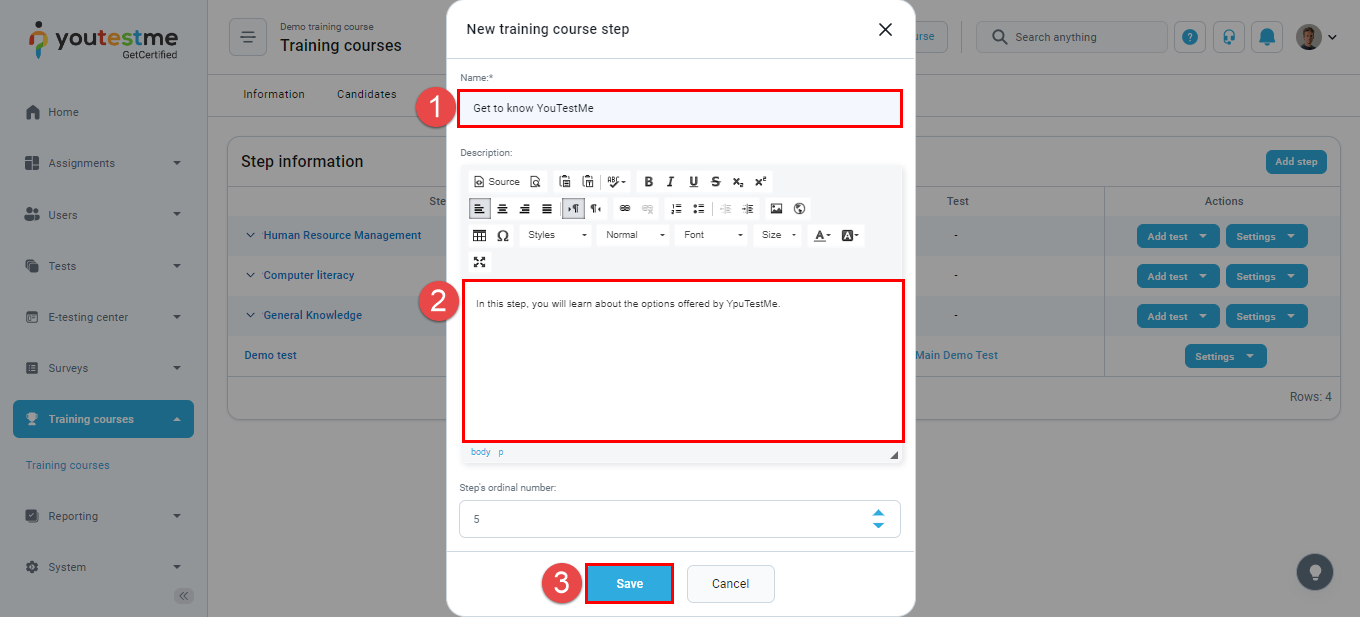
- Click on the “Add step” button.

In the pop-up window:
- Enter the name of the training course step (Required).
- Enter a description – you may describe the learning content of this step (Optional).
- Click the “Save” button to add a step.
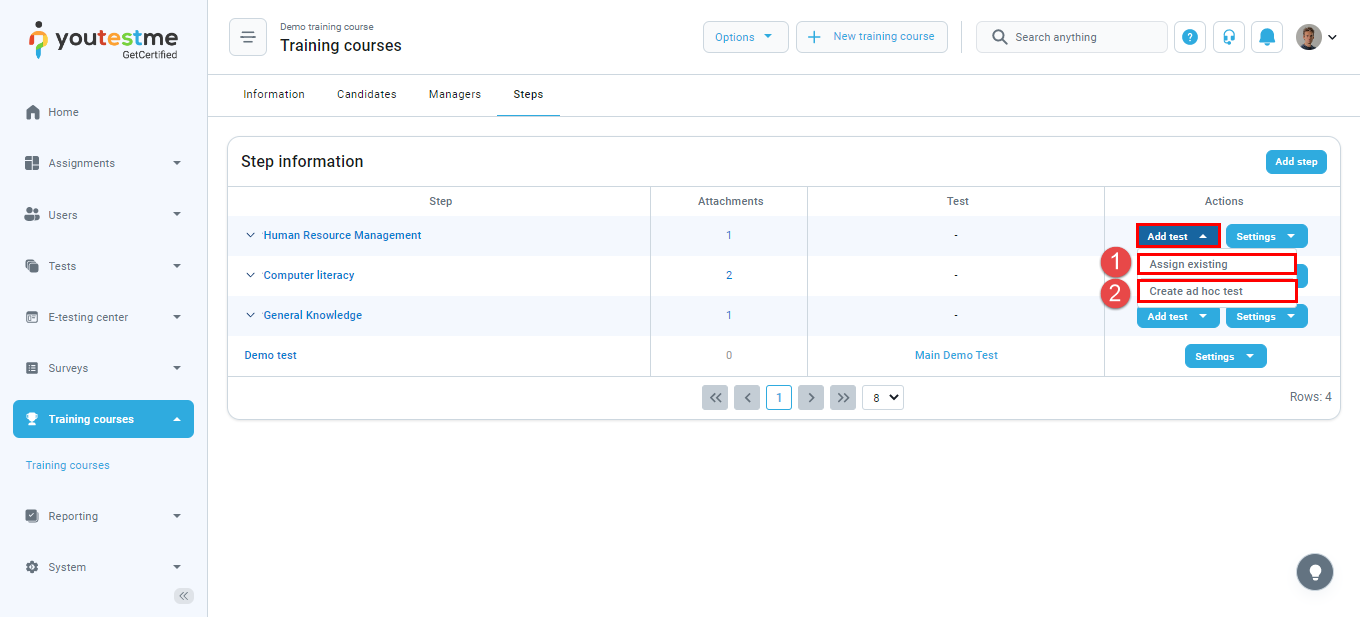
You can add a test or multimedia or configure the added step.
Adding tests to a training course step #
To add a test to a training course step, click the “Add test” button. You can:
- Assign an existing test previously created through Test Creation Wizard.
- Create an ad hoc test – a test that is created quickly in the training course module.
Uploading multimedia files to a training course step #
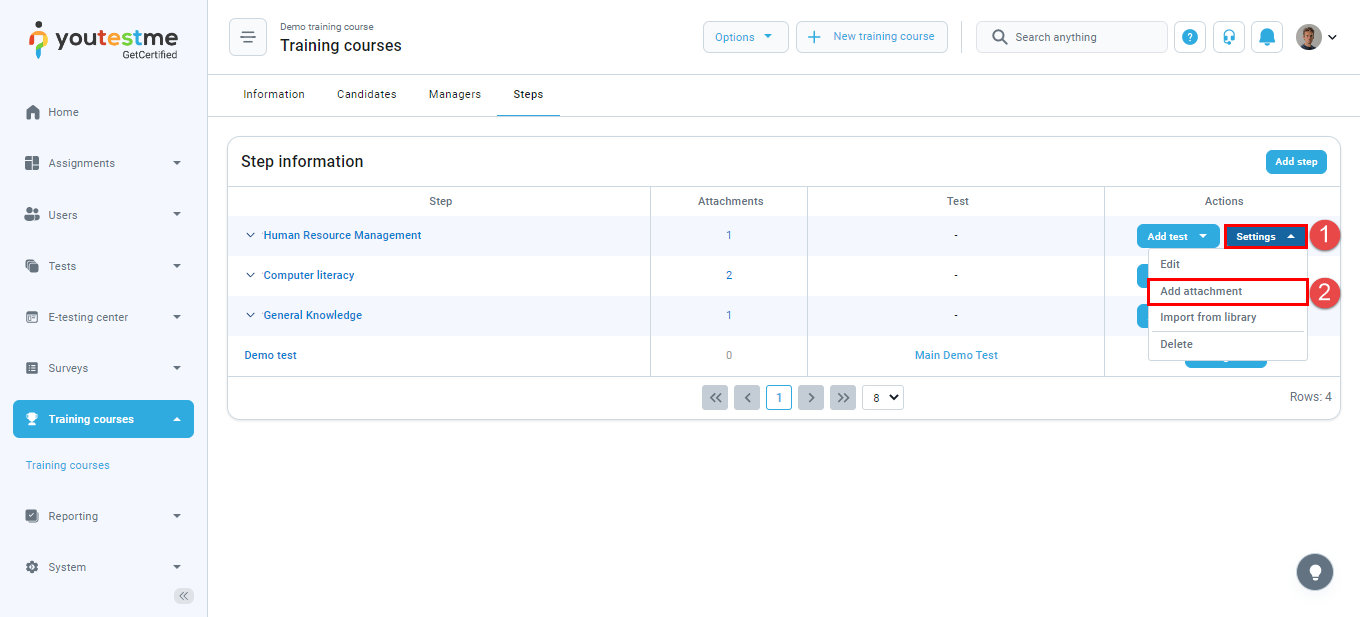
To add a multimedia file to the created step:
- Click on the “Settings” button.
- Choose the “Add attachment” option.
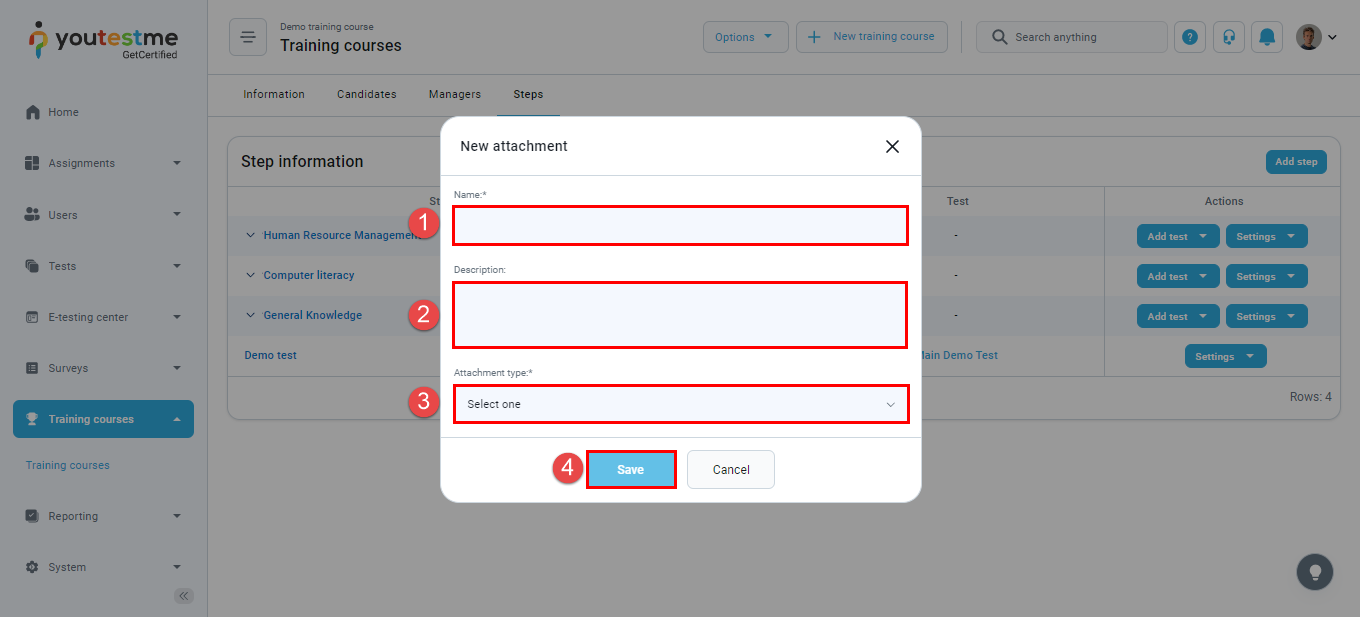
In the pop-up window:
- Enter the name of the attachment file (Required).
- Enter a description (Optional).
- From the dropdown menu, choose the attachment type (PDF, Video, Picture…).
- Click the “Save” button to add the file.
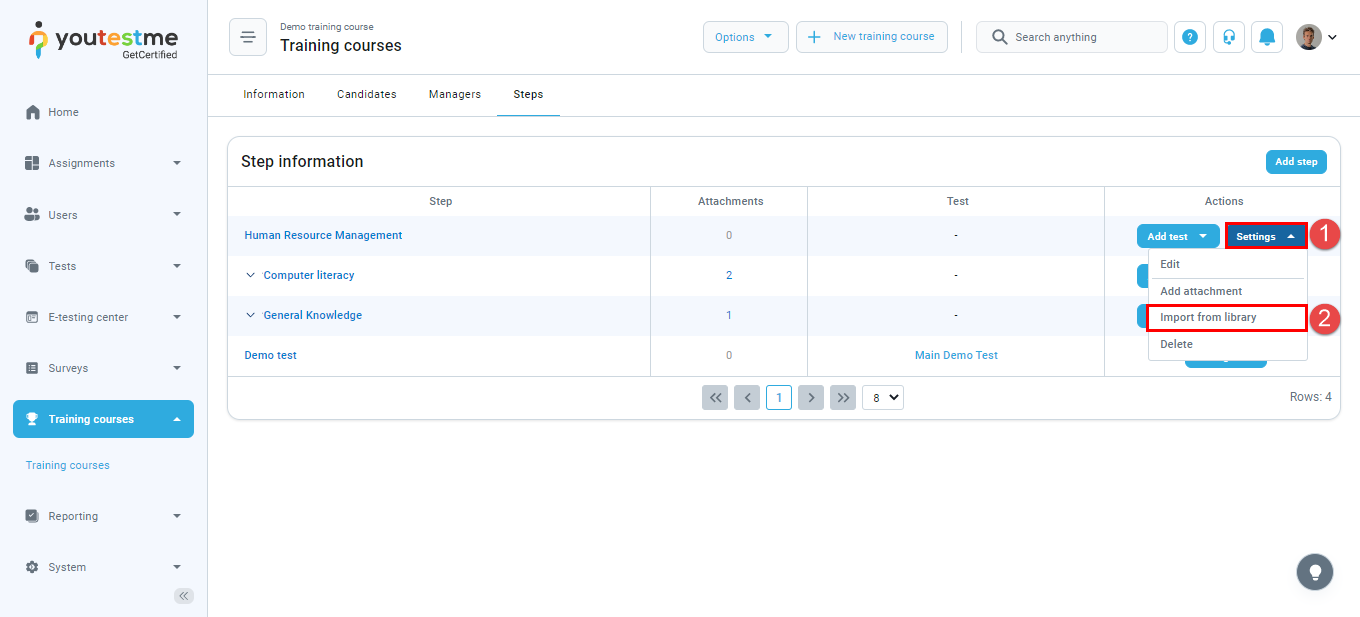
Adding multimedia files from the library #
You can choose to add a multimedia file from the saved files in the library. You just need to:
- Click on the “Settings” button.
- Choose the “Import from library” option.
- Check the box “View all attachments from the system”.
- Click on the “Preview” button to see the file or the “Import” button to add it as an attachment to the step.

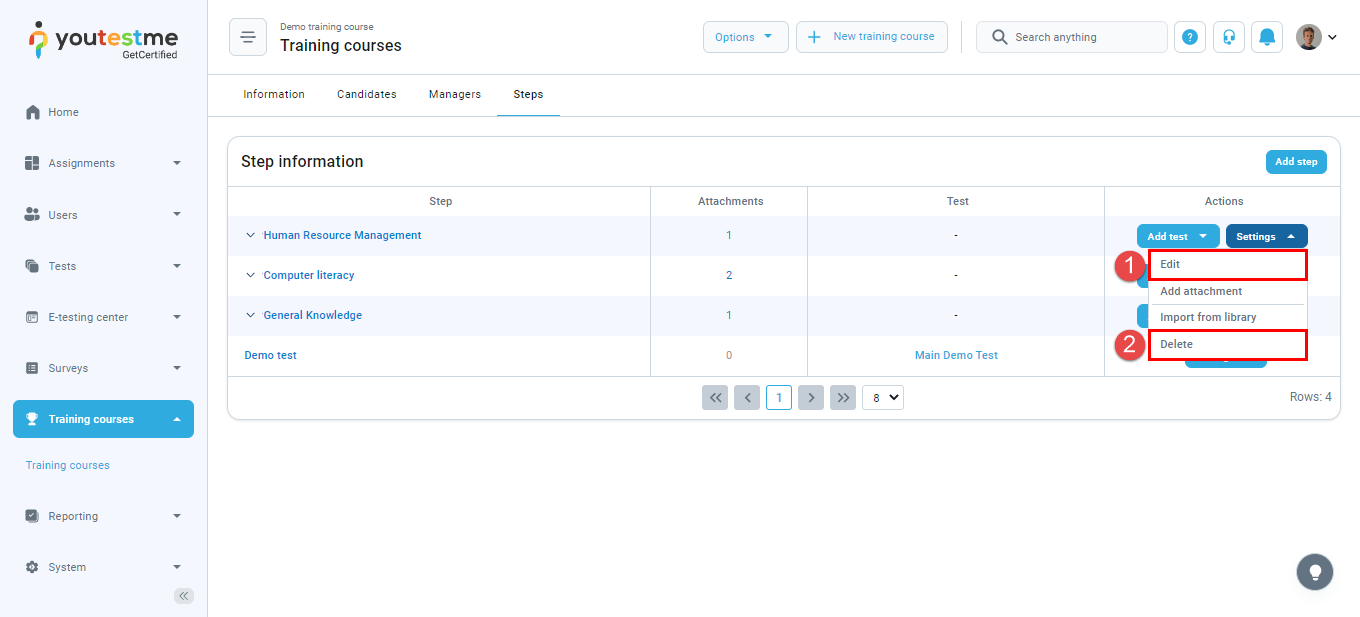
Other settings of the training course step #
Click on the “Settings” button, and from the dropdown menu, choose one of the following actions:
- Edit the training course step – change the name and description.
- Delete the training course step.
For more related instructional materials, please visit:
